We provide bulk orders for our products. Whether you're a contractor, electrician or builder, we want to be your supplier of quality products at competitive prices. We believe in customer satisfaction! We provide fast shipping and also have the best customer service in the industry! Please feel free to contact us at 647-350-8898 if you need any assistance with the price.
Model
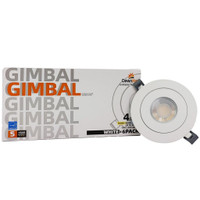
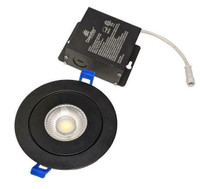
DR40RF-WH/BK/SN
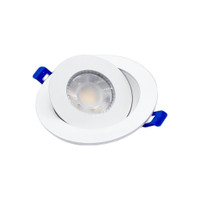
Features
Super Low Profile
High Performance
Easy Installation
5CCT Switchable
10%-100% dimming capability
5 Years Warranty
Specs Sheet
Cut-Size: 4-1/4”
Wattage: 12W
Input: 100-120V AC, 60Hz, 0.09A
Beam Angle: 110°
Lumens: 870LM
CRI: 80+
5 CCT: 2700K/3000K/3500K/4000K/5000K
Power Factor: 0.98
Light Source Life (hrs): 50,000
Type IC: Yes
Airtight: Yes
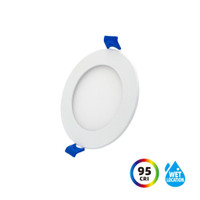
Damp Location: Yes
Wet Location: Yes
Assembly Instructions:
1.Risk of electric shock- turn off power before inspection, installation or removal.
2.Locate a suitable position to place the LED fixture and open a hole in accordance with the cut-hole dimensions (refer to Hole Cut Table for appropriate size).
3.Run the electrical wire from the switch (power supply), through the mounting hole-use NMD90 OR BX cable.
4.Open the hardwire box swing cover and remove the appropriate knockout(s).
5.Insert the electrical supply cable through the knockout.
6.Wire box using supplied quick connect push-in terminals. Connect green ground wire or cable to the green wire box. Connect white wire cable to the white wire box. Connect black wire cable to black wire box.(Fig. 1).
7.Place all wiring and connections back into the box and close the cover.
8.New construction applications: Junction box shall be firmly secured to studs, joists, or similar fixed structural units.(Fig.2)
9. Remodel applications: Do not require the junction box to be firmly secured after the mounting plates, studs, joists, or structural units that have been concealed. Snap off the junction box tabs(Fig.3), then insert into the ceiling(Fig.4).
10.Push spring loaded clips on the fixture upwards and insert fixture base into the mounting hole. Release the clips and fixture will be pulled flush to the ceiling(Fig.5).
11.Once the assembly is complete, turn on power to confirm fixture is working properly.
Hole Cut Size:4-3/32"104mm
Tools Required:
Saw
Measuring Tape
Electrical Wiring (use type and gauge suitable for application to connect the fixtures).
SAFETY: For your safety, this fixture must be wired in accordance with local electrical codes and ordinances. All work should be done by a qualified electrician.
Warning: Make sure power is OFF from the electrical panel before starting the installation or attempting and maintenance. For indoor installation only.
For WET location applications, after the fixture is installed on the ceiling, put silicone glue to seal the gap between fixture and ceiling.